Teach it about your business
Make your assistant answer from YOUR information — add your website or documents during the wizard, and add more any time from the Knowledge base.
Out of the box, your assistant is friendly but doesn't yet know your hours, prices, or services. Teaching it is simple: you point it at your website or hand it a document, and it learns the answers. This page shows the two places you do that — during the build wizard, and later from the Knowledge base.
Think of it as briefing a new team member. The more you give it — your FAQ, your price list, your "About" page — the better it answers your customers.
What you'll do
- During the wizard's Train step, add a website or a document.
- Any time afterwards, add more from the Knowledge base.
Teach it while you build (the Train step)
If you're still in the create wizard, you're already in the right place — this is step 2, Train.
Choose a website or a document
On the Train step, pick one of the two tabs: Website URL or Upload file.
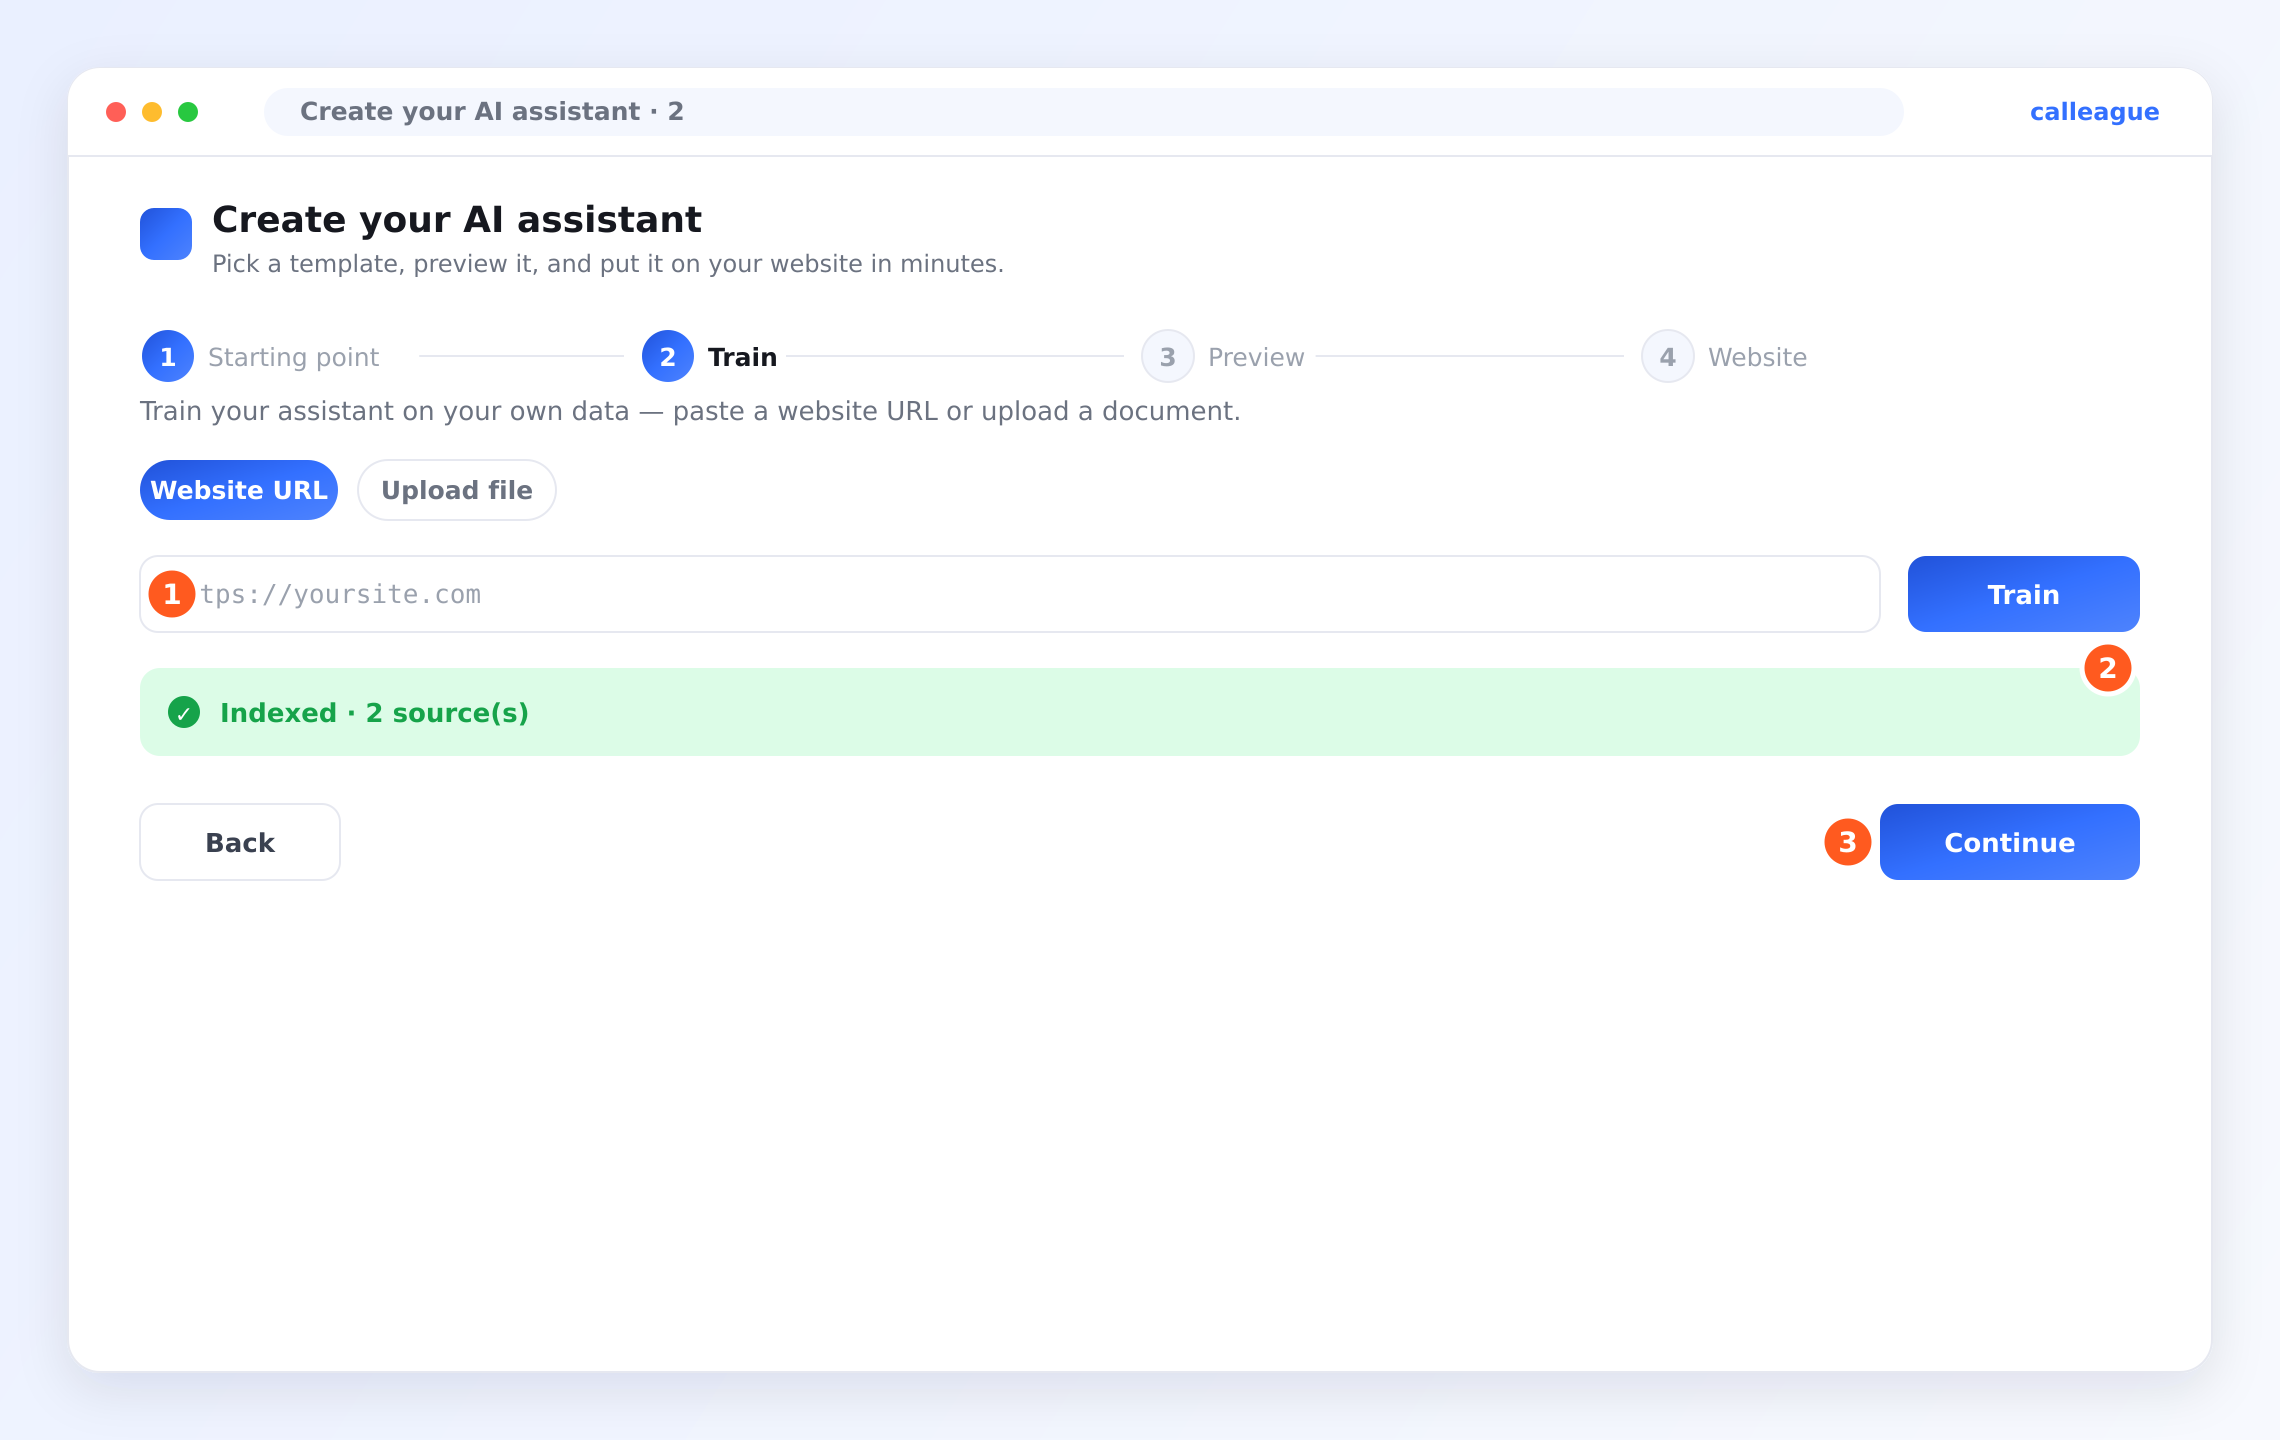
For a website, paste your link into the ① address field and click Train. For a file, switch to Upload file and choose a PDF, DOCX, TXT, or MD document.
You'll see the field ready for your link, with the Train button beside it.
Wait for "Indexed"
Give it a few seconds to read what you added.
You'll see a green ② "Indexed · N source(s)" message — that's your confirmation the assistant has learned it. Then click the ③ "Continue" button to move on.
Teach it any time (the Knowledge base)
You can add more information whenever you like — you don't need to rebuild your assistant.
Open the Knowledge base
In the left menu, click Knowledge (or use the Manage knowledge button on the Home dashboard's ④ "Knowledge base" card). The Knowledge base screen opens.

You'll see two buttons near the top (marker ①) — + Add a website and + Upload a document — and a Your sources list below.
Add a website or a document
Click + Add a website and paste a link, or click + Upload a document and choose your file (PDF, DOCX, TXT, or MD).
You'll see your new item appear in the Your sources list with a green Indexed label once it's ready — for example yoursite.com/faq · Website · Indexed.
Add several sources over time. Each one fills a gap, so your assistant keeps getting better at answering real questions.
What good knowledge looks like
The best things to add are the pages and documents your customers ask about most:
- Your FAQ page — it's already written in question-and-answer form.
- Your pricing or services page — so it can quote prices and explain what you offer.
- Your "About" or "Contact" page — hours, address, and how to reach you.
- A menu, brochure, or price list as a PDF — perfect for a restaurant or shop.
Skip pages that change minute to minute (like a live order tracker) or that need a password to view — the assistant can only learn from pages it can read, just like a visitor.
A quick example
A flower shop adds its yoursite.com/faq page and uploads price-list.pdf. Now when a customer asks "How much is a rose bouquet?" or "Do you deliver on Sundays?", the assistant answers correctly from the shop's own information — no guessing.
If something looks different
| What you see | Why it happens | What to do |
|---|---|---|
| No green Indexed label | The link is mistyped or the page is private | Check the address starts with https://, or upload a document instead |
| Your file won't upload | It's an unsupported type | Use PDF, DOCX, TXT, or MD |
| The assistant still doesn't know something | That fact isn't in any source yet | Add the page or document that contains it |
| You can't find the Knowledge base | You're on a different screen | Click Knowledge in the left menu |
Frequently asked questions
Next steps
Your assistant now knows your business. Let's put it where your customers can reach it.
Put it on your website
Copy the snippet and add the chat widget to your site.
Connect a phone number
Let your assistant answer real phone calls.
Try your first conversation
Chat with it, call it, then read the transcript.
Not sure what to add? Write to us at info@arpanet.com.tr and we'll help you choose the right pages.
Create your first assistant
Build your AI assistant with the 4-step wizard — name it, train it, test it, and put it on your website. A screenshot for every step.
Put it on your website
Add the Calleague chat-and-voice widget to your site by copying one line of code from the wizard's Website step and pasting it into your website.